After my recent ordeal with Thawte to obtain a code signing certificate, the web site was totally incapable of letting me install the certificate on Windows 7 and IE8, so I had to resort to some fairly intricate trickery to get it working. The result is a portable Personal Information Exchange (.pfx) file which can be used to sign executables for Windows (exe, ocx, dll, cat), OSX, AIR, and Java.
UPDATE: Thawte has updated their web system since this article was written, and now appear to support Windows 7, making the manual process of extracting the certificate from the web page in step 3 and 4 unnecessary. The rest of the process may still be relevant. I have not tried Windows 8.
UPDATE: When using signtool it is necessary to include Thawte’s intermediate certificate using the /ac option, otherwise users will not be able to verify the chain of trust and the certificate will be useless. See step 5 for instructions.
Disclaimer: I have only tested this signing windows .exe and air applications. This is not guaranteed to work, Thawte may change their process at any time.
I sincerely hope they do update the process, and make it possible to skip all these steps and simply download the .pfx file from the web site. In true tyrannical fashion everything works up to the point where you actually want to get what you’ve paid for, then suddenly nothing works (including the phone support).
Looking at their VBScript code on the certificate download page it appears that they only cater for Windows up to Vista, running one OCX for Vista and a different one for everything else. I suspect that Windows 7 would need the same OCX as Vista but the site tries to run the one for XP which is why it fails.
Enough ranting, on to the code. Simply put the steps are:
1. Install Thawte intermediate CA certificates.
2. Get the PKCS7 certificate embedded in the JavaScript on the web page, decode from base-64 and save as a .spc file.
3. Import/install the PKCS7 certificate from the .spc file.
4. Export the PFX certificate from the management console certificate snap-in.
5. Profit!
In case that was too vague, here’s the steps in more detail.
Note! It is necessary to perform these steps on the same computer that was used to apply for the certificate. The reason is that the computer’s private/public keys form part of the certificate and are needed when exporting the PFX file. Once the PFX files is created it can be shared across any other computer.
Step 1: Download and install the Thawte intermediate CA certificates*
Downloads and instructions available here: https://search.thawte.com/support/ssl-digital-certificates/index?page=content&actp=CROSSLINK&id=AR1406
Step 2: Get the PCKCS7 certificate
The first step is to get the certificate file from Thawte. To do this means extracting the certificate from the source code of a web page and converting it into a usable form. The web page contains the certificate in PKCS7 format encoded in base 64.
- Log on to Thawte Certificate Center using Internet Explorer. Select the certificate, then click “Pick up certificate”
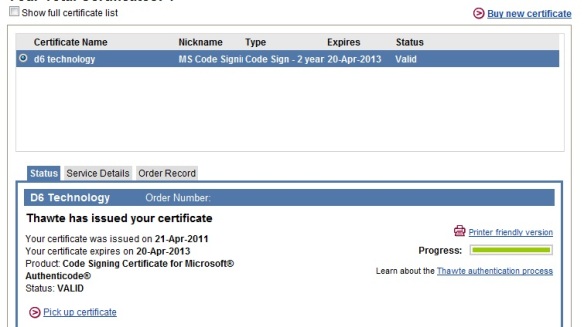
- The page will load and display some infomation about the certificate. Right-click and select view source.

- In the source, locate the base 64 encoded string which contains the certificate. Copy the text between the single quotes (this is the PKCS7 data encoded in Base-64). Eg:
<script language="JavaScript">

var base64cert = 'MIAGCSqGSIb3DQ...LjaBsKQth4AAAMQAAAAAAAAA=';

</script>

- Decode the text from base64 into binary and save as a PKCS7 file with .spc extension.Get the converter tool I wrote from GitHub: https://github.com/lukevanin/Base64-encoded-PKCS7-converter, or alternatively use an online base64 decoder (eg: http://www.motobit.com/util/base64-decoder-encoder.asp) and save the data using a hex editor.
Step 3: Import the PKCS7 certificate
Once the PKCS7 certificate has been saved to a file, it needs to be imported into the windows certificate store. This allows us to export it later on in a portable format which the signing tools can use.
- Double-click the .spc to open it in certmgr. When certmgr opens, expand the list and locate the certificate, then double-click on it to open the certificate dialog.

- In the certificate dialog click “Install Certificate”
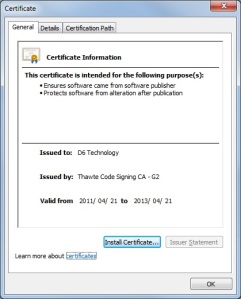
- The certificate import wizard will appear. Click “Next”.

- Select the “Place certificates in the following store” option, then click “Browse”.
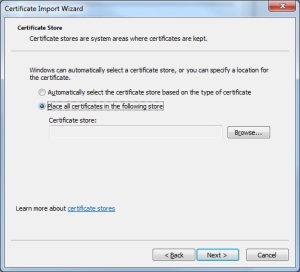
- In the dialog that appears, select “Personal”, then click “Ok”.

- Click “Next”, then click “Finish” to complete process of importing of the PKCS7 certificate.

Step 4: Export the PFX file
The PFX file includes the PKCS7 certificate as well as the private key of the computer which was used to request the certificate. The private key is used to encrypt the certificate when it is used to sign a file. The certificate is later decrypted using the public key, which is embedded in the signed file.
- Click the Start button on the taskbar, and type “mmc.exe” and hit enter to open Microsoft Management Console.
- Click the File menu, then “Add/Remove Snap-In”
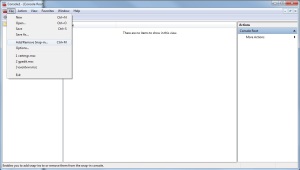
- Double-Click “Certificates
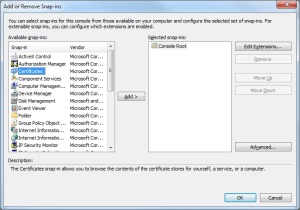
- Select “My User Account”, then click “Finish”.

- Click “Certificates – Current User”, then click “Personal”. Right-click on the certificate, select “All Tasks”, then click “Export”
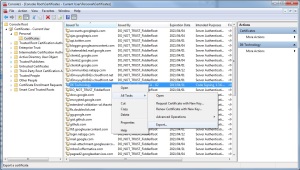
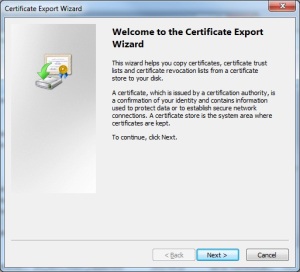
- A new dialog box will open, click “Next”.
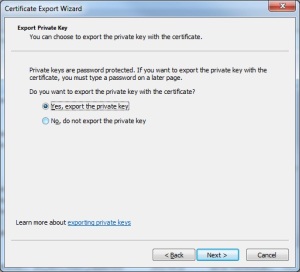
- Select “Yes, Export the private key”, then click “Next”.
- Ensure “Personal Information Exchange – PKCS #12 (.PFX)” is selected, then click “Next”.
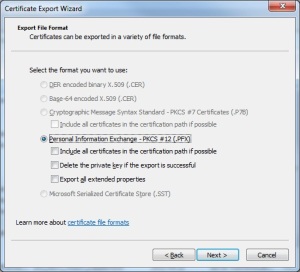
- Enter and re-enter a new password for the .pfx file, then click “Next”.

- Click “Browse” and select a location to save the .pfx file, then click “Next”.

- Click “Finish” to produce the .pfx file at the selected location.

Step 5: Sign files using Microsoft SDK sign tool
Files are signed on windows using the signtool command line application, which is part of th Microsoft SDK.
- Download and install Microsoft SDK for Windows 7 and .Net Framework 4.0
The SDK requires at least one Visual Studio product to be installed before-hand. Express editions are suitable. When installing the SDK, only .Net Development Tools needs to be selected (approx. 23MB). - Run signtool to sign an executable, eg:
signtool.exe sign /f myCertificate.pfx /ac thawte-intermediate-ca.cer /p myPassword /t http://timestamp.verisign.com/scripts/timstamp.dll myApplication.exe
- To check that the certificate was applied correctly, right-click on the file, click properties. A “Digital Signatures” tab should be visible.
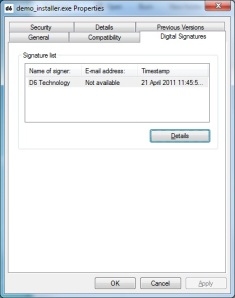
If the tab is not visible then it means that there was a problem signing the file. Check the output of signtool for errors or warnings which may indicate the cause of the problem.

Glad to hear it’s an incredibly intuitive process.
Indeed, only 30 lines of code, 24 steps, 5 downloads, and 1 command line. Couldn’t be easier 😛
can I sign a .cab file using this procedure
Thanks for the process. Having the same issue, but PKCS7 file does not contain the private key. Is your private key stored from before?
Hi David,
Yes – the private key is stored in your machine’s key store and is not included in the PKCS7 file, which is the reason for importing the PKCS7 file and exporting the PFX file. The PFX file will include the private key. Check here if your’e still having problems.
– Luke
Ahh. What happened to me is someone requested on their machine (which binds to keystore) and I couldn’t get access to the private key. We did the revoke and then I requested it with IE on Windows XP, which allows you to save the the private key separately. I’m sure you already know this, but just in case someone reads this and has XP.
David
The link in the very first step is B0RKED
Thanks for the heads-up David. The link should be working now. Otherwise, Google “Thawte Intermediate CA”, or check http://www.thawte.com.