
iTunesConnect lets you upload content to Apple’s servers, which your app can download when a purchase is made. This alleviates the need to maintain your own servers, and can be a quick and relatively easy way to start selling downloadable content in your iOS app.
Until now Application Loader has allowed developers to upload content for in-app purchases (IAP), however this support has been removed in version 3.7. After looking at the documentation and forums, the only alternative seemed to be use ITMS Transporter from the command line, along with some non-trivial XML and archiving.
Starting with Xcode 9.1 it is possible to upload in-app purchase archives directly from Organizer, which is what this blog post is about. This post does not cover any of the programming required as that is already covered in extensive detail on the developer portal.
Overview
Setting up in-app purchases is done in two parts:
- Set up the IAP in iTunesConnect.
- Create and upload the IAP content in Xcode.
Part 1: iTunesConnect
Log into iTunesConnect. Select your app, click on the “Features” tab, then click on the “In-App Purchases” menu item. Click the round “+” button to create a “non-consumable” type in-app purchase.
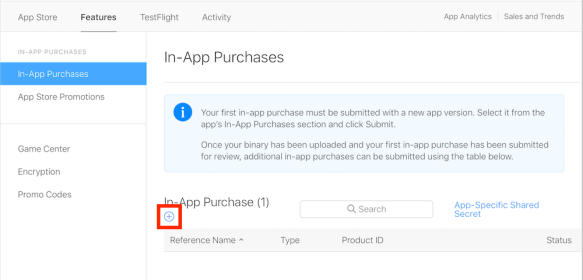
Click the round “+” button to create an in-app-purchase.
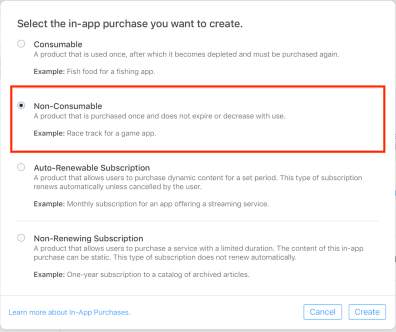
Select the “Non-Consumable” product option.
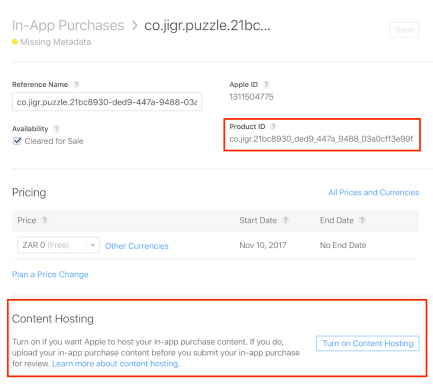
Complete and save the form for the IAP:
- Product ID: Uniquely identifies the IAP. This ID must match the one provided in Xcode in a later step. Note that this field may only contain alphanumeric characters, underscores, and periods. Dashes and other characters are not allowed.
- Reference name: Your own name for the content. Not seen by the end-user.
- Pricing.
- App Store Promo: Optionally include an image, title, and description so that the IAP can also be displayed in the App Store.
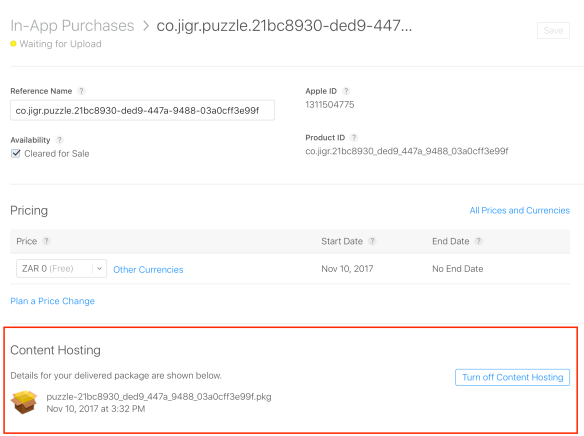
Click “Save”, then click “Turn on Content Hosting”.
Make sure to click “Turn on Content Hosting“, to enable the content for the IAP to be stored by Apple. If this is turned off, you will need the infrastructure to provide the content when the purchase is fulfilled. This button is only enabled after the IAP is saved.
That’s it for iTunesConnect. After the content is uploaded the IAP screen will show the uploaded package.
Part 2: Xcode
After the IAP is added into iTunesConnect, it is time to create and upload the content from Xcode. This is done by creating a new target for each product, archiving the target, then uploading the archive through Organizer.
Step 1: Create the target
Click the File menu ➝ New ➝ Target. Alternatively, select the project in the Project Navigator, then click the “+” button below the “Targets” section.
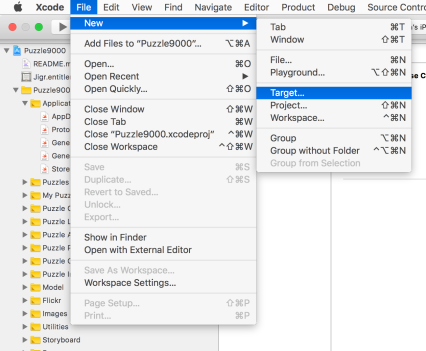
Click File ➝ New ➝ Target
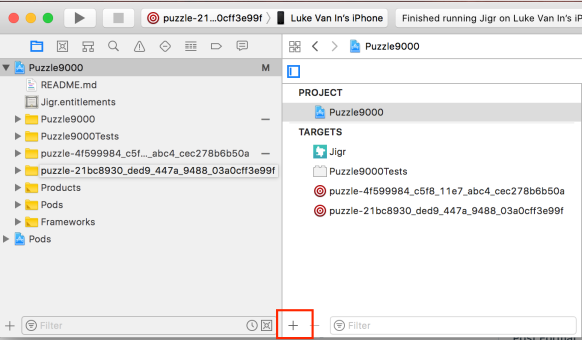
Alternatively, click the project name in the Project Navigator, then click the “+” button below the list of targets.
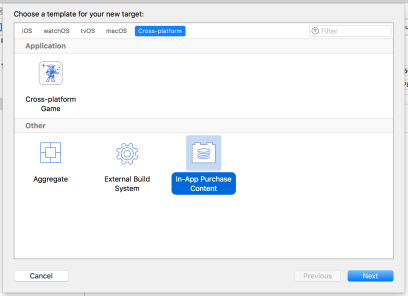
In the template chooser, select “Cross-platform”, then click “In-App Purchase Content”
A new target will be added to your Xcode project. The target will start out being empty. Add the IAP content to the target. Note that each IAP will have its own target. E.g. If the IAP is for a downloadable level, only add the files for that one level. Create a separate target for each level.
Step 2: Add content files to the target
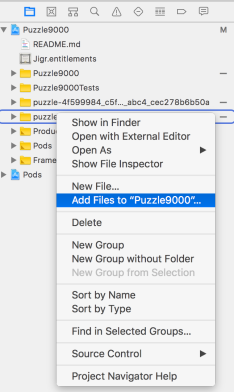
To add files to the IAP target, right-click on the group folder in the Project Navigator, then click “Add files to …”.
To ensure that the files have been added to the correct target, click on the file in the Project Navigator, then expand the Inspector window if not already visible. Ensure that the correct target is checked.
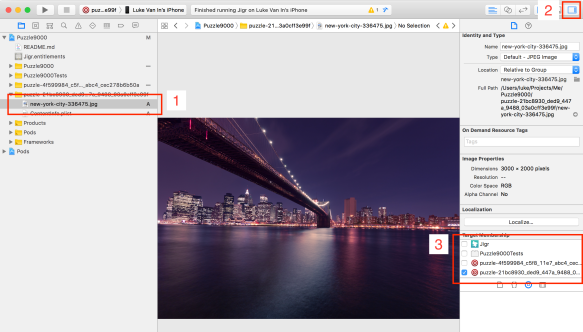
Ensure that the correct target for the in-app purchase is selected.
Step 3: Archive the target
Check that the correct product ID is used for the target. Click the project in the project navigator, then click the target for the IAP. Check that the Product ID in Xcode and iTunesConnect match exactly.
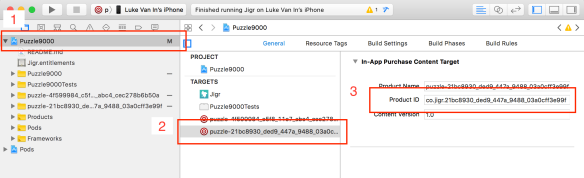
Ensure that the Product ID in Xcode matches the one used in iTunesConnect.
Make sure product scheme for the IAP target is active. Click on “Product” menu ➝ “Scheme”, then click on the name of the scheme for the IAP target. Another way to choose this, is by selecting the scheme in the drop-down next to the “stop” button on the toolbar below the menu.
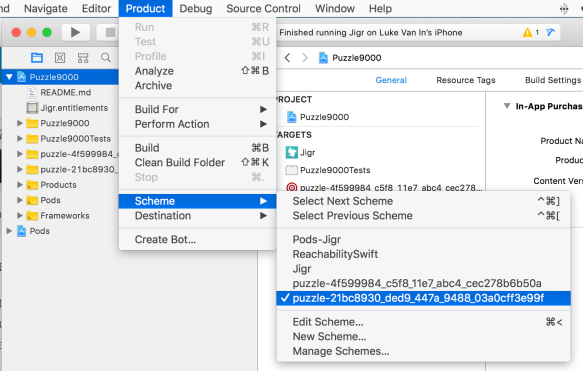
Select the correct scheme for the IAP target.
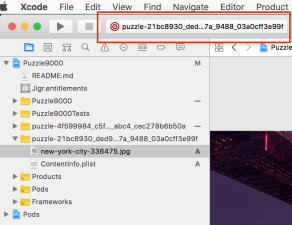
Alternatively, select the scheme from the dropdown.
Finally, with an iOS device attached, click the Product menu ➝ Archive.
Step 4: Upload the archive to iTunesConnect
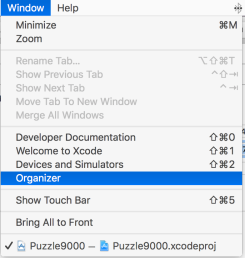
The final step is to upload the archive to iTunesConnect from Organizer. The organizer should appear automatically after archiving. If it does not, click the Window menu ➝ Organizer.
Select the latest archive for the IAP, then click Upload to App Store. Follow the prompts to select the developer team and app record.
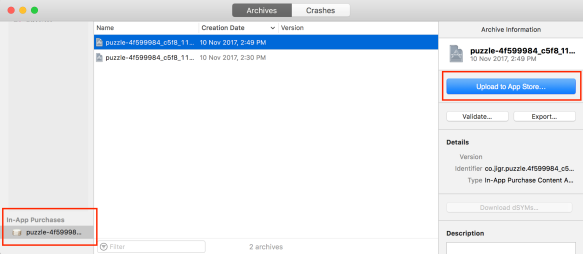
Select the In-App Purchase archive, the click Upload to App Store.
Step 5: Verify the content in iTunesConnect
If the upload is successful the package will appear in the IAP in iTunesConnect.
Troubleshooting
When things go wrong, as they may, here are some things to check:
- The bundle ID in Xcode must match the bundle ID for the IAP on iTunesConnect exactly. This was the cause of the majority of problems I encountered.
- Content Hosting must be turned on for the IAP item in iTunesConnect.
- In-App Purchase must be enabled in the Capabilities in Xcode.
- Ensure that SKPaymentQueue.default.add() is called as early as possible in the application life cycle, preferably in the AppDelegate.application(:didFinishLaunchingWithOptions:) method.
